A Mid Century Coastal Inspired Living Room

My husband, Matt, and I just returned from a trip to California to celebrate our 5 year anniversary and I decided to put together a living room design board inspired by our trip. I've loved this kind of chic, relaxed-but-sophisticated west coast vibe for awhile now and this room is a nod to that. 

*sources for all items shown at bottom of post

Breaking it Down:

  • This custom, mid century inspired sofa is a truly versatile piece that could be used with many different looks and styles. When investing in a larger piece of furniture, it's important to consider whether it will still work if you decide to change up the the colors and accessories down the road. 
     
  • I really love how the woven blue plaid rug has a strong geometric pattern to match the clean lines of the rest of the design and how and the texture and color variations provide warmth and depth. The more casual feel of the this rug, along with the leather poufs used as additional seating, create a cozy, easy-to-live-in atmosphere. 
     
  • The interwoven walnut legs of the coffee table carry mid century sensibilities and the round glass top keeps the piece light and modern. The round top also echoes the form of the rattan chair and wall mirror creating balance and juxtaposition with the linear elements.
     
  • It's no secret that rattan is seeing a comeback and this swivel lounge chair is a handsome and unique take on the style. With a shape reminiscent of 70's furniture, the organic flow of the rattan, a polished chrome base, and a perfectly sophisticated black seat cushion, this piece is on trend without being predictable. 
     
  • Accessories really can make or break a room! It's important that they feel at home in a space without getting all matchy-matchy. Artwork and decor should feel collected even if you ordered it all online the same day.  I've carefully selected a few pieces that gently reinforce an overarching color palette, bring warmth and "story" to the room, and highlight a range of mediums and tones. 
     
  • This light fixture is a new favorite and I can't say enough good things about the scale and proportion. It is available in various stem lengths so be sure to consider your ceiling height when selecting the overall height. 

Please pin from these original image sources: 1 || 2 || 3 || 4 

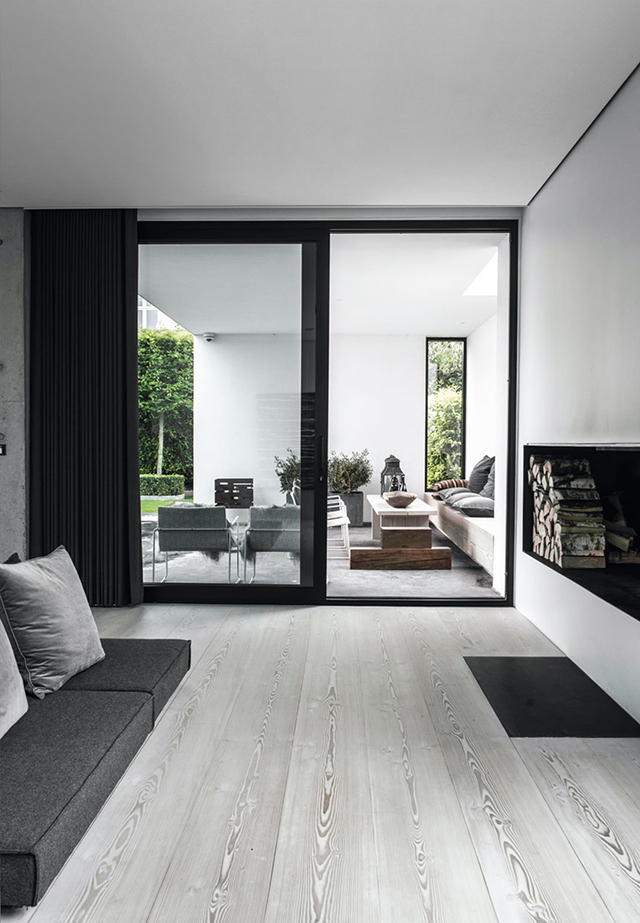
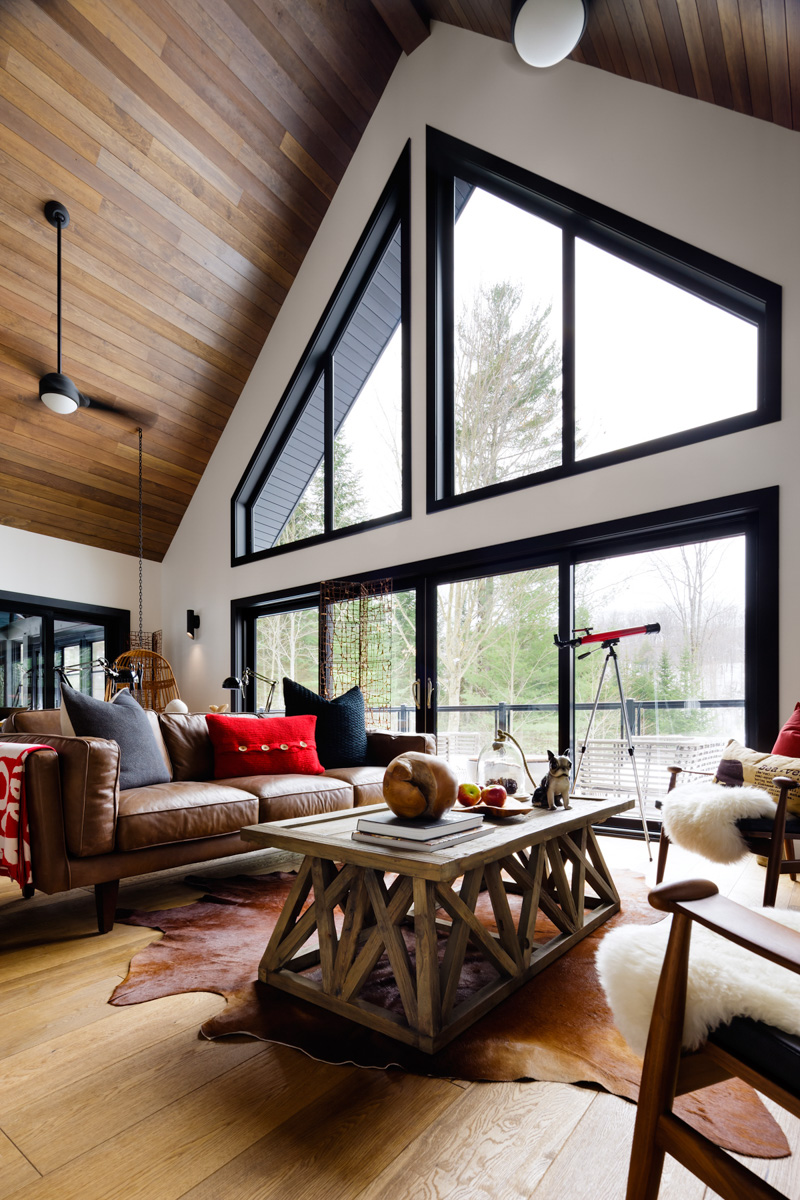
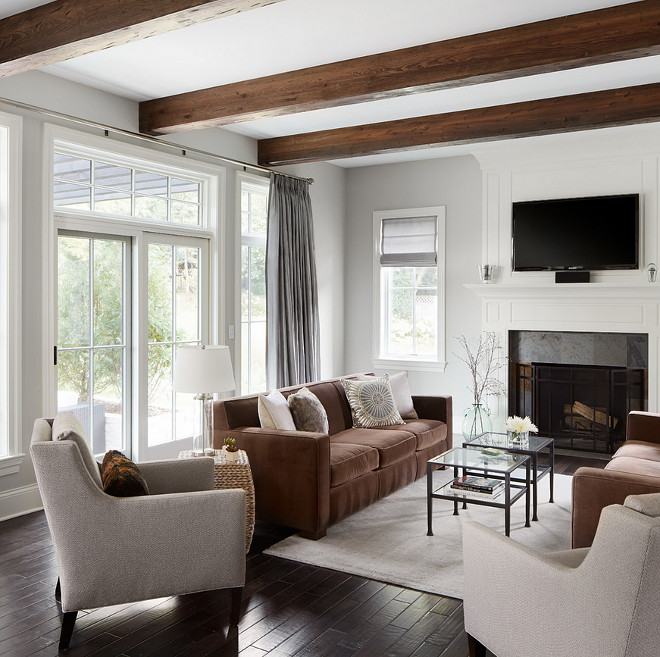
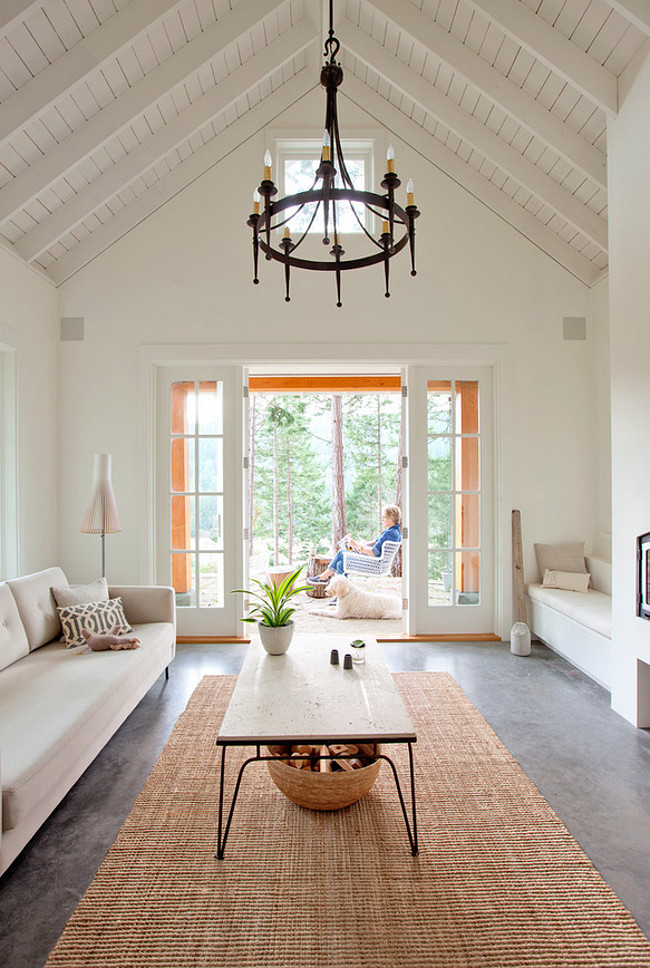
Where to Use This Style: 

I also wanted to show the versatility of the collection so I rounded up images a few different types of interiors (picture the room itself, not the current furnishings) that each serve as a gorgeous backdrop for this look. Placed in a modern, rustic, traditional or eclectic setting, these pieces meld into the perfect blend of classic and interesting; I think they would look stunning in any of these four spaces. 


End Table Makeover: Part Two

In case you forgot what these end tables looked like to start, you can see the first few steps of their transformation here. After some deconstruction, wood filler, and a lot of sanding, these beauties were ready for some white paint and new legs!

I started by only painting the exterior but eventually decided a consistent coat of white was the way to go. Trying to save a few bucks, I used trim paint that I had lying around from other touch-ups. It took many coats to get a good coverage and then, after it had cured for about a week,  I noticed a lot of yellow coming through. Sooo... I sanded it down and started again. This time I used a high gloss enamel paint from Lowes and that worked much better!

The new legs (also from Lowes) were easy to install and dramatically changed the look of these pieces!

I sanded, stained and then sealed the drawer fronts with a clear poly. The process was pretty simple; I think the hardest part was making myself wait the recommended time between coats.

Here's what they look like now!

I am in LOVE with the transformation of these nightstands! Still to come: a total master bedroom makeover including the bedside lamps seen above and a DIY headboard!

Okay, one last before and after!

Bar Cart Makeover

A finished project deserves a drink!

I bought this bar cart a thrift store for a mere $6 and even though it was in pretty rough shape, I was immediately excited about its potential! A good cleaning, a coat of bronze-y gold spray paint, and a new bottom shelf, and it is looking pretty sharp! Since the bottom piece of glass was missing, I re-used and cut to size a piece of backing that was removed from a different project. I think the walnut color brings an appropriate mid-century vibe. I toyed with replacing the casters but eventually decided that I liked the character of the existing ones. 

So that's that! A quick, simple makeover that resulted in a gorgeous addition to my dining room!

Since it is a bar cart after all, I decided a simple, summery cocktail was in order! This Rosemary Greyhound is light, fresh, and easy. The recipe is from Natalie at Tastes Lovely

Ingredients

Rosemary Simple Syrup

  • 2 cups of water

  • 2 cups of sugar

  • 6 sprigs of rosemary

Cocktail

  • 2 ounces vodka

  • ½ ounce rosemary simple syrup

  • 4 ounces grapefruit juice

  • sprig of rosemary for garnish

Instructions

  1. Simple Syrup: In a small sauce pan over medium low heat, dissolve the sugar into the water for about 5 minutes. Do not let the mixture boil or crystals will form. In a heat safe container, pour the warm sugar water mixture over the rosemary sprigs and let it steep for at least 1 hour. The rosemary simple syrup will keep in the refrigerator in an airtight container for 10 days.

  2. Cocktail: In tall glass filled with ice combine the vodka, rosemary simple syrup and grapefruit juice. Garnish with a sprig of rosemary.


End Table Make Over (part 1)

Ever on the hunt for some cheap furniture to make over, I scored these end tables on craigslist for only $5... FOR THE PAIR! I figured, at that price, even with some chipped veneer, they were worth investing a little elbow grease. Full confession: they have been sitting in my garage for months and I am just now pulling them out. Here are the first few steps of their transformation...

The before pictures: see those dovetail drawers and Lane stamp!? These are the real deal!

The first step was to  take the bases and backs off. The base had some water damage and the back was in okay condition, but as soon as I saw these I knew I really wanted an open cube look.

Next up was using some wood filler to fix the chipped laminate. This is the first time I've attempted this and so far I'm really pleased with the result. (Yes, that's a butter knife I'm using as a putty knife... We're classy like that around here!)

Sanding, painting, and new legs are up next... stay tuned!